Tuesday, December 18, 2012

Bit Basics #2

Today I'll start covering the next part of the bit - the bars, or part that goes in the mouth. There are a billion options out there. Many people talk about certain reactions of their horse to certain actions - my best tip is to get a friend, grab your bit of choice, and let them pick up contact, pull, jerk, etc on you like you would on your horse. It's definitely educational!

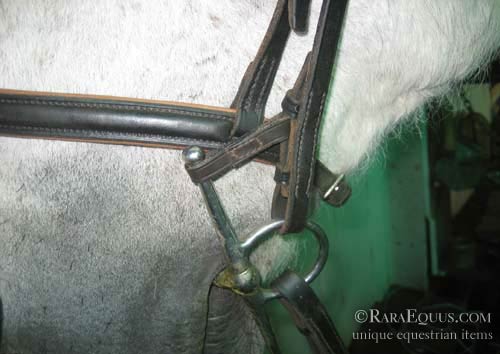
Mullen mouth: straight across, no joints. Often found rubber covered, these bits influence by "tilting" in the horse's mouth. Foxie's pelham was like this, though there are also rubber "dog bone" or mullen mouth bits that are bendy - interesting, but make sure they don't sustain damage and keep in mind that sometimes the cores can snap!

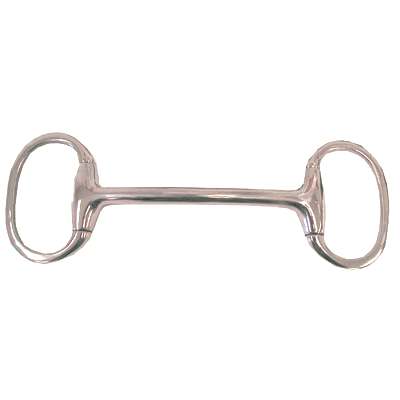
There are several mullen options - the simple metal straight bar, the rubber "dog bone" and the happy mouth ridge are common, and as you see come on a variety of cheeks:


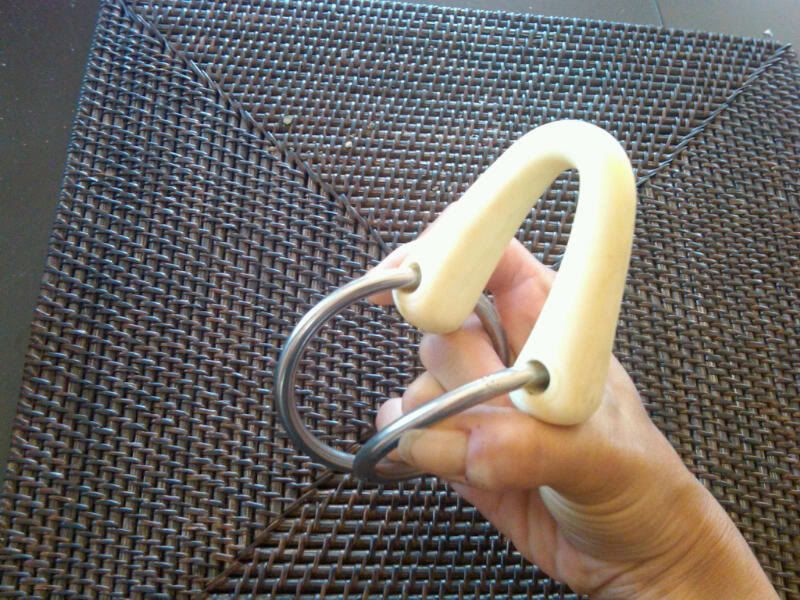
Some rubber models are flexible - usually the black rubber being the least flexible and the white plastic/stuff being the most flexible. The most flexible mouth piece material is the Nathe or  Herm Sprenger Duo. I personally bought a Nathe, as my young horse was broken out in one, and really loved while it worked for the young horse. Eventually, her needs changed and we moved on, but these bits are pretty cool!

The Nathe snaffle - look at that flexibility!


And the Duo:


Single Joint: The standard horse bit, with a center joint. Some people feel that these can create a "nut cracker" sensation on the horse's pallet and tongue, but they have been an industry standard for a long time.


French Link: The french link is the new black of horse bits. Gentle, this bit is considered "soft" as it breaks more gently over the tongue and doesn't have the nut-cracker action of the above single link snaffle. I like the french link for it's ability to pick up one side of the horse's mouth, or their dropping shoulder and have more finesse for dressage.


Dr. Bristol: Don't be fooled. I know this looks like a french link. Believe me, it's not. The center link is rotated so the edge - not the nice flat center - lays on the tongue. A little sharper reprimand than our friendly Mr. French Link. The best way to tell the difference is that the french link has the curve to the center link - the Dr. Bristol does not. This is NOT dressage legal.


The "bean": The bean, also called a "lozenge" is another version of a french link, though not as tricksy as the Dr. Bristol. The bean can also be substituted for rotating links, rubber link on a metal bit, etc etc. The "link" is rounded or ball shaped. Always double check your rule book for dressage when using one of these, as you can see that they do come in alternate materials which may or may not be legal. Happy mouths often come with a "lozenge" or center link that rotates, which I believe is not legal, as well, so watch out for that.


There are some cool Herm Sprenger models out there that are an interesting twist on our "bean" or Lozenge options:


Waterford: The Waterford is definitely not crystal. And it's definitely not dressage legal.

This interesting little piece just may be an OTTB owner's best friend. The Waterford is great for horses who grab the bit (like racehorses who have been taught to grab the bit and lean on it for racing balance) and abscond with you across field and glen. The Waterford is soft and liquidy, so there is nothing to lean on - just don't "see-saw" your reins or loose your temper and tug. In the right hands, the Waterford can be a great alternative to some of the bigger bits out there, like Pelhams, running gags and other "fun". They come in a multitude of mouthpieces including gags, bouchers, loose rings (as pictured), dees and full cheeks so they do offer a lot of options.


The slow twist: The slow twist is another "in between" bit that might be that little change you need to keep your snaffle-mouthed jumper in a snaffle. The slow twist gives the bit a little extra "hey there" with your half-halts, and can often be the thing you need to get your horse back to make the striding in that combination.


The double twisted wire: This is not a bit for the faint of heart, or the soft of mouth. I have used this bit on one horse, at a camp, and lawd knows he needed it; and even with it I had no brakes, no steering and no flexibility of jaw or neck. My advice? Just don't use it.

Yikes.

Other factors are also involved with bits, such as the weight. Sometimes you will see bits that are "hollow weight" or "weighted", and while it can be confusing, I say trust your gut! Light bits will be light in the horse's mouth, and thus the pressure you apply will be more noticeable - but light weights are usually large and round (as are happy mouth/rubber bits) which can be comfortable for your horse, as a larger diameter means more area for the pressure to be applied to. 

Weighted bits are rather the opposite - They are a constant weight in the horse's mouth, and thus are "slower" where lighter bits are "fast" reacting. This means that the time between the sensation of your hand asking for something comes to full power more slowly, allowing you to be smoother and subtler. Foxie really likes hers - it's thinner than her french link eggbutt, and she seems to be perfectly fine with the single link bit. It's a loose ring, meaning less to lean on, and she seems more hesitant to grab this bit and go "dead" to my contact while ignoring me/running off/resisting. 

Food for thought, huh?

Questions?

Ashley and Foxie


Friday, December 14, 2012

Winter Riding

As a Minnesotan, I have already had my lion's share of winter riding experience. Lately I've really been enjoying my "Track My Hack" app by Woof Wear. Today Fox and I were out on the roads:


For those of you new to winter riding, make sure if your horse has shoes, you're picking feet out (sometimes I ended up needing a rubber mallet to get packed snow out of shoes - tapping gently on the side of the hoof or even using it VERY carefully with a hoof pick to chisel away ice) and consider one of the many ways of keeping snow from being packed in hooves: PAM, snow pads under shoes, etc. 

Another consideration is to pick good ground- while I do trot and canter a large amount of my "trail rides" I make sure to do so only on level surfaces or slight hills that have a snowy shoulder and aren't packed down or icy. I would make sure to walk your chosen area first and "feel" the snow under your horse's hooves - any crunching or typical ice sounds and I would say no go! Ice can be hidden under even the most benign snow drift and can prove very dangerous for your horse.

I dress warmly in layers - I learned fast from my 3 hour lessons at HHTC (and we had lessons outside down to 0*) . I have both the Kerrits Long John capris and "Cuddle Dud" brand long johns and they both work well under breeches (the cuddle duds come in an amazing 4-way stretch - don't get anything else, they are the BEST!) and wear a thermal or long john top. I love love love my Kerrits breeches - I have both the Sit Tight and Warm and the Powerstretch models, and the Windpro fabric especially is amazing, and the full seat helps you be a little tighter in the tack where fleece breeches tend to be slippery. Wool socks, Mountain Horse Ice riders, a vest and a coat with a warm layer AND a wind layer usually top me off. I also like using face shields when outside to keep my lungs from burning and my face from being too cold and usually add one of the dorky helmet covers with the fleece wrap around to increase ear coverage (the behind the neck ear muffs sit too low for my Tipperary, but a band works fine) and hold the face shield up better. Gloves are also a HUGE deal - and I like the SSG silk liners not only on their own, but they are great to put between your hand and a hand warmer pack and then put gloves over the top - that way the handwarmer pack doesn't burn you when you're too numb to feel! 

In the winter and late fall Foxie wears a quarter sheet either at the beginning of our rides, or all the way through. I have two:

The fleece Dover Saddlery, modeled by me here:

And our new addition, a Horze brand quarter sheet with a nylon windproof/waterproof top layer and fleece underneath. 

It has a tail string that you can shorten, lengthen or do away with all together, and is cut away so there is no folding and stuffing involved to get a clear girth area (check the video for what I do with the Dover). The nylon was a little scary for Foxie at first, as it makes noise in the wind where fleece is silent, but it's a cozy riding sheet and has the little details - like plastic dees for the tail strap over metal, that can get cold and "zing" your horse's haunch that I really like. I also like 50% off Coupons, making this a 25$ quarter sheet.

Fox also wears boots of some form, though they are harder to maintain in the winter because they need more frequent washing if you ride on warm days, resulting in wet, sandy wraps that tend to freeze instead of dry. 

As a plea from your horse, please make sure to warm up your bit - like that scene in "A Christmas Story" where the kid gets his tongue stuck to a metal pole... that's what can happen to your horse's tongue, lips or gums. Beyond that, you can actually cause nerve damage to your baby's sensitive mouth and cause him or her to be headshy for later bridling, a habit that can last a lifetime. 

Finally, I stretch Fox before I ride. Some people do the leg lifting stretches shown here:

And yes, I support the lunging before a ride - not just on a line, but with loose side reins to encourage back stretching! Fox isn't as big of a fan of this:


And now, last but not least, me stretching Foxie. Pardon my voice, my crabby horse and the crappy video. 


As Always, Comment with questions!

Ashley + Foxie


Friday, November 9, 2012

Bit Basics

Hello all,

Since it's on my mind, I figured I'd start what I plan to be a series of articles on bits. Today I'm going to start from the outside aka the part you can see - the side pieces. The cheeks. Whatever you want to call them. They're actually something important, and it's good to consider what your horse is used to, or goes best in, and stash that knowledge away. It's useful! All of these bits are considered Eventing "dressage legal" in their most elementary forms - we'll talk joints and other disqualifying factors in another post. As a note, many of these bits come in options with loops or slots depending on their make - these are not dressage legal parts of the construction, and are usually added to create leverage, or pressure on the poll (the area behind the ears) of the horse. This leverage encourages the horse to lower his head to gain relief from the pressure on a sensitive area, and is not allowed in dressage.

The Eggbutt.

Foxie started her career in a eggbutt snaffle. This bit has a stationary ring, meaning that there is no turning or spinning going on. They look like this:
Notice the fixed ring? When you hold this bit in your fingers, the rings will move laterally across the line of the mouthpiece, but will not spin or rotate. This allows the bit to lay very quietly in the horse's mouth, which can work for a horse who is very sensitive or suspicious of hand contact. Eggbutts, depending on the mouth piece, are considered to be very gentle, and while the fixed side does help with turning somewhat, this bit is more of an all-rounder to have in your arsenal.

The Loose Ring

The Loose ring is just how it sounds - loose. The turning action makes the bit flexible and allows the horse to move it in his or her mouth, which allows for maximum comfort. It can also be the little change a horse wearing an eggbutt needs to be loose and light in the bridle. The moving rings offer just enough motion that often, the horse can't grab the bit, a common problem in ex-racers, and encourages them to keep their mouth soft and pliable rather than hard and ignoring your hands, and therefore making it really hard to stop!


The rings are sliding, which is the advantage of the bit, but can also cause rubs. Some people use bit guards to keep this from happening. They look a little like the photo below - just make sure you're pulling them to the right sides when bridling, as your horse really doesn't want them in his mouth!


They come in lots of fun colors - I've heard many different methods as to putting them on the bit, but I'm going to say don't plan to take them off without scissors! 

The Full Cheek

The full cheek snaffle is another good starter bit - the extended cheek assists with turning and keeps the bit from sliding across the horse's open mouth if he is gaping his mouth. 


What many riders don't know about full cheeks is that they require (technically, don't get me counting how many people I've seen not using them ) bit keepers to keep the top of the cheek in position. They look like this:

Some people think that they add poll pressure, but I don't really believe that. It creates a nice neat bridle and helps keep the horse from impaling himself or anyone else on your nice turn-helping bit. This bit should sit quietly in the mouth, like the eggbutt, as the bar is stabilized by ring and the bit posts. 

The Dee Ring

The dee ring is the hunter ring classic. D's are classy, and give many of the same benefits of the full cheek without the prominent points (which is great if your horse likes to itch on people!) and some of the same facial pressure that the ringed bits can offer. Again this bit will sit more quietly in the horse's mouth, but may not be good for horses who like to grab the bit. Dees can come in various sizes and styles - more squared off versions are usually called racing dees, while a larger, rounded dee is often a King or Hunter style D.

Pretty classy, huh?

The Boucher

The boucher is going to be the biggest gun you can bring into a dressage ring. Looking at the structure, it can offer a slight poll action and again can assist in turning a la the full cheek. There is the standard one:

And then there is the only branded one that I might actually believe creates poll pressure: The KK Ultra. It retails around 200$.


Notice the difference in the bar position? That makes the difference. I always like to take the bits I'm using on my horse and try them between my hands - you will see people do this with their feet, too - and have someone grab the reins and pull appropriately, and also give me a yank or two. I don't feel any leverage with the boucher, but still find the bit to be a nice one to try if you're not having luck with some of the more traditional sides. 


As per always, questions are welcomed and much loved. We'll move on to the bar section of the bit in the next post!

- Ashley and Foxie

Monday, October 29, 2012

RIP Dublin Boots and a PSA message

In honor of my beloved Dublin River boots giving up the fight after 2 years of near-constant abuse, I felt that I should write about riding boots. RIP, London boots!


On the subject of riding boots, yes, you need them. Riding boots have the right grip and tread to be safe in the stirrups and usually have a hardened or steel toe to protect your feet from naught pony feet stomping. There are, however, a dizzying amount of kinds, colors and ranges.

YARD BOOTS

I used to wear tall boots when ever I rode, and still prefer them for riding dressage for reasons I'll discuss later. Yard boots are great for chores, getting horses in from muddy pastures and generally bumming around. I go for ultra comfy so it's absolute bliss when I finally get to take my show boots off and slide into my yardies.


Most riders go for the traditional wellie. While the target cute color ones are fun, I go for the L. L. Bean brand (pricier...) because they hold up really well if you treat them right and have stayed really water tight. Taller is better, and make sure your calves don't squish them down, as that will stress the rubber and cause them to crack much faster. Nothing is worse than stepping into a puddle and feeling that cold squish of unexpected leaking boot! I also make an effort to keep mine inside during the winter, as the cold has a similar effect.


Another option, that is really more of an all-purpose boot, is a British style country boot, like my beloved Dublin river or pinnacle boots, or Dubarry boots (the classic!). These boots are pretty darn waterproof, intensely stylish at eventing shows, and generally are pretty darn comfy. Some people ride in them, too.

(12/2/14 update: I talk more about my Dublins here as well.)


RIDING BOOTS
Riding boots can be anything from a sturdy pair of tall boots to simple cheap-o paddocks and half chaps. If you haven't ridden with half chaps (I missed that memo for most of my younger life) they're amazing for adding grip, and come in many materials and colors.

I like my plain zip up Ariat paddocks and half chaps that are pretty boring in comparison to some- calf skin and lots of elastic for a nice fit - the only racy thing is that they go in the washer! Love it!

Below is a simple half-chap and paddock combo - and the Mountain Horse Sportive boot - a good example of a tough wearing tall boot that can hold up to every day wear and tear.


TALL BOOTS

Sadly, in my experience, unless you're at a nice, fancy barn where you can stay out of the elements, I've found tall boots just can't stay nice looking as a regular riding boot. I've thus transitioned from wearing tall boots full time to wearing paddocks and half chaps, so I don't wear out the fine zippers on my very expensive tall boots.

There are two types of tall boots - Dress and Field. Dress boots are popular in dressage, but are also acceptable in all other disciplines. Field boots are more traditional fox hunting, jumping and eventing boots, though you will often see higher level eventers ride dressage in dress or dressage boots, as they create a neater line and often dressage specific boots will be stiffer, or boned, to facilitate that amazing quiet dressage leg. Below are three examples, all from Mountain Horse ( I like continuity, and their boots, don't say I didn't mention bias ;) ) from left to right: the MH Firenze Dress Boot, the MH Victoria Dressage boot and the MH Richmond Rider Field Boot. Dressage boots, the center, are sometimes called "stovepipes" because of their stiffness. The Firenze and Richmond Rider show a high spanish top, a current fashion designed to make your leg look longer. I think they look great!


Just for fun, the Richmond Riders on a human being you may recognize:


My singular issue with the Richmonds is the lack of spur rest, but grips help prevent sliding and I like that I can cheat my spurs up or down without the rest being in the way. But still, think about that before you buy, if it's important!

WINTER BOOTS

Ok, enough fun. Winter boots are amazing. Again, I have Mountain horses (seriously, I guess I need to get new paddocks and half chaps... I'm pathetic!) but there are many good brands. Many of them are synthetic and are tough to break in, so I would suggest trying until you find something comfortable from the get go that doesn't bruise the back of your leg when you're riding, so test out several leg positions. There are some leather ones out there, but for most snow tramping purposes, I'm going to vote the heavier synthetic types that can take your from bringing in to turning out with a ride in between.


The warmest of the warm, MH Rimfrost Riders (I have the Ice rider) and the Ariat Bromont

**Extremely Biased story ahead**

Its time for it, folks. I was dragged wearing my tall winter boots. The foot is much larger than your slim summer boots, and you don't realize that you are in potential danger until it happens. It got wedged in the stirrup when I came off, and Foxie decided I was dead and headed for the barn, with me sliding along between her back legs. I was extremely lucky to have my father there to catch my horse, and to have a horse who cares about me enough to not step on me. Please, please, please, please consider investing in a pair of these:


They may be dorky, or only "for little kids" but safety stirrups could save your life. I have them on both of my saddles, year round. I have learned to really like the weight for picking my stirrups up when I lose them, and even though I trust my horse with my life, being dragged sucks and it could happen to anyone, at any time.  Please be safe. 

Did I miss anything?

Sunday, October 28, 2012

So you bought a horse - now what?! #2

Vet and farrier care are givens for those of us who have been doing this for a while, but it's not always intuitive to those who have been taking lessons, but haven't had the experience of leasing or owning before. While I'm sure there are horse owners out there who are able to do the absolute minimum in horse care, I am a firm believer in proper horse care. As a competitive athlete, how can I expect my horse to perform at her best when she isn't at her best?

WORMING
First of all, de-worming regularly is a important factor to your horse's health. If he hasn't been de-wormed in a while, or you don't know his history, start with something gentle like ivermectin or pyrantel paomate (ask your vet!). Wormer is dispensed by weight - unless your horse has been on a scale lately (Foxie goes on every time we go for lameness checks, but most horses aren't seen in-clinic),I would suggest using a weight tape to determine the proper dosage.

Again, if you are unsure of your horse's worming past, be a little conservative, as it shocks the system to remove the worms all at once. Thus, we use gentler products that work on one type at a time, and give them a few weeks between doses, and don't give them too much.

What many new horse owners don't know if they do know how and why we worm, is the rotation schedule. I like to use the three way, as it's most effective on a wide variety. Fecal tests can be done by your vet, and they can advise you as to the best worming schedule for your area. My vet suggested the three way schedule from Smartpak, and I managed to have a copy of it when they stopped having it online.

This is my schedule, copied from Smartpak Equine (who no longer has this posted, Sad!)
Two Way

Jan/Feb
March/April
May/June
July/August
Sept,/Oct.
Nov/Dec
Ivermectin or Ivermectin and Praziquantel
Equimax, Zimectrin gold, Rotectin 1.87%, Ivercare

x

x

x
Pyrantel Paomatat
Strongid paste, Rotectin P, Strongyle Care
X

x

x

Three Way


Oxibendazole/Fenbendazole
Safe-guard, Panacur, Anthelcide EQ


x


x
Ivermectin/Iv. Praziquantel mix
Equimax, Zimecterin Gold, Rotectin 1.87%, Ivercare

x


x

Pyrantel Paomate

Strongid paste, Rotectin P, Strongyle Care
x


x


From thehorse.com, a wonderful resource for all things horse care:
"Based on our studies at Texas Tech, we recommend a 4-way rotation for many farms and ranches. Some conditions may warrant a six way rotation only if needed. The quarterly rotation includes dewormers targeting adult parasites, larval parasites, tapeworms and bots. We believe it is important to consider the range of parasites including ascarids, and not be based only on small strongyle control. Several very recent studies have documented resistance of equine ascarids to the ivermectin class of parasites. This is very alarming due to the serious consequences ascarids can pose to foals. In high numbers, blockage of the gut can occur with fatal results.
Because there is no new class of dewormer on the horizon, we believe it is very important to preserve all of the current classes of dewormers, which have different applications in parasite control in the horse. [...]
The bottom line is that many types of deworming regimens are being proposed. There need to be further research studies on the effectiveness of these programs throughout the US as well as around the globe. In addition, remember that each farm needs to be considered individually and decisions need to be made based on testing and management information."
Moral of the story? Worming is important to your horse's health, and should be a part of your horse's routine.

VET CARE
Regular vet care, like regular doctor's visits for you, are a necessary evil for your horse. Make sure your horse is up to date on all vaccinations, including West Nile and Strangles. Why risk losing your beloved horse to a horrible disease when you can easily prevent it?

thehorse.com on West Nile: "horses of all ages have succumbed to the disease [unlike humans, who are rarely effected]. Symptoms of WNV are similar to other neurological conditions including rear limb buckling, knuckling over and ataxia. As of the first part of this month 33 states had reported 186 equine cases of WNV. Horses doing poorly rarely recover--the fatality rate for horses with WNV is about 33%--but fortunately there are steps that we can take that can help reduce our risk and the risk of our horses for exposure."

Make sure the vet checks your horse's teeth, as horses need floats almost every year, sometimes more. Horses don't graze constantly like they are meant to in the wild, and thus we need to help them keep their teeth (that grow constantly) in check. If you don't keep your horse floated, they can have extreme discomfort wearing a bit or bridle and can struggle to eat properly, and endanger their own health.

Beyond the two biggest reasons for vet visits, my vet also checks the horse's condition (I love having the fittest, healthiest horse in the barn! I work hard!), temperature, does a fecal test for worming (see above) and in the winter (January, for us) pulls a coggins for the coming year. Coggins tests are important, as they are what allows us to travel off site. All of the places I have taken Foxie have required you to have a negative coggins test to prove that your horse is disease free and won't infect the large group of horses at the show or event. Vets can also furnish  you with proper health certificates if you are planning on trailering out of state - make sure to check if you need a health certificate before you travel or the state patrol can send you back home and give you a fine.

FARRIER
Remember the ugly foot from my last post? That foot needs some love! A good farrier is intensely important to your horse's comfort and soundness. By a "good" farrier I mean, in my experience, a CF or JF - certified, or journeyman farrier, who has gone to farrier school rather than learned the trade from another farrier (trained or untrained). These farriers are able to focus on the horse's anatomical structure and cut their feet to  help the horse move in the most comfortable way possible - or work to correct problems of conformation or bad trimmings in the past to help the hoof grow in the best way.

Is your horse tender on the rocks, or feels like he's going "hot sand, hot sand!" when you ride? He may need horse shoes, or a few days off. Your farrier should be able to tell you if your horse needs shoes all the time, some of the time, or not at all. This is factored in by the horse's genetics, how much and what you do when you ride, the surfaces you ride on and environmental factors.

For example:
Foxie is a pasture puff. While she is tender on the large rocks, she is comfortable with out shoes, and the farrier is able to put a "bare foot" style rolled trim on her feet to prevent cracking and breaking. Thus, even though she sometimes experiences discomfort, she is barefoot. When she was eventing, she wore shoes with clips and often was hot shod, as keeping her shod was very important. My farrier laughed at me because I could wear through a pair of aluminum eventers in 6 weeks. Apparently he didn't get that I was BUSY!

Talk with your farrier about shoe options, or alternatives like hoof boots. Shoes come in all shapes and sizes, as well as materials, and a trained farrier can advise the best option for your specific needs. A good farrier is worth his or her weight in gold; I was happy to spend 140$ on shoes every 7 weeks knowing that my girl was making amazing changes to her troubled and generally written off feet.

The things we do for our horses, right?

Friday, October 26, 2012

So you bought a horse - now what?!

If you're a new horse owner, first of all, congrats! Second? Time to get to know your new partner. A great way to maintain your shiny new horse's overall health and soundness, here's a good routine to help you head off problems and build a great basis of knowledge about your new partner.


When you arrive at the barn, you probably run to your horse's paddock/stall and retrieve them. As you walk up, take a minute to look: are they standing "normally"? Is Pookie bright eyed, pricked-eared? It takes some time to establish normal habits (does he rest his back leg? which one?) but turn your perceptiveness up to 11 and familiarize yourself with what is normal and what is not.

Most people bring your horse in and groom. If he's wearing a blanket, or a halter during turn out, check for rubs or damage to either item, especially if he's out with new horses, or unused to wearing them. Leg straps or the polls or hardware of a halter can rub, and it's good to catch those things NOW, and not when you find a big angry sore underneath them.

Normal! What a nice shiny coat! 

As you brush, check for abnormal amounts of dandruff, or non-seasonal hair loss. Brush your way down the legs and notice tendon "normal" (think about it in levels of contrast - if the leg is puffy, the tendons are less defined) down the lower leg, the way the knee feels, feel below the fetlock, and familiarize yourself with the temperatures of all leg apparatuses as well as the hoof. As you pick out the foot, check out the shape of the foot, the frog's firmness, shape etc.
NOT normal! 

Also make sure you are removing all of the mud you can from your horse come fall and spring - mud can hide injuries, create a breeding ground for all sorts of skin ailments and even cause cellulitus. Nobody wants to come to the barn to find a fat legged horse!

Knowing your horse's normals is very important, and can help you narrow down the problem when a mystery injury occurs. For example: My horse tends to stock up in her stall, but this goes down with exercise or turnout. Thus, when someone calls me and freaks out about her "legs looking puffy" after she's been in her stall, I don't get too concerned.

I'll cover some of the common horse maladies in another post, but being aware of all things "pony" means that you notice sooner when something goes awry. Your peace of mind, and your vet will thank you!

Ashley & Foxie

Clipping

Today I wanted to talk about clipping. I only started clipping horses around two years ago, as I got more and more frustrated with sweaty pony making me late getting back to school because she took hours to dry off. Foxie is prone to the winter skin funks (remember dark damp warm?) and works hard under saddle, and I am not too fond of the pony steam facial. Ick!

When I started clipping I was using my cordless Wahl Cordless Pro with a 10 blade:
Shockingly, for a show prep clipper, it worked really well, and was light and well shaped for my hand. I had to clip with the cord plugged in, but it was still a nice multi purpose clipper. I decided that the blades were a bit dull and purchased some new ones for my second (last year) of clipping, and I think the motor had finally had it (they are 5+ years old!). They were quickly replaced with these:

The Wahl Show Pro. Again, I resisted buying a mega body clipping clipper (those things cost hundreds!) and bought something that cost 35$. We also purchased some combs and use it to clip our Australian Shepherds. Its a solid clipper with only two flaws- the handle on the left side tends to move, but a proactive person can use tape (or just keep an eye on it) to make sure that you don't shift from a ten to a 30 blade when clipping (MAJOR difference in length left behind). The other flaw is serious #whitegirlproblems - the cord is a little short, and thus you need an extension cord. Biiiiig deaaaaalll. But worth noting. Its a little more vibrate-ey, but not nearly as bad as a giant body clipper, and stayed relatively cool when I was using it.

Clipping supplies:
Clippers - 10 or 15 blade for most clips - a  30 blade is too close
Extension Cord
Well lit area, preferably with cross ties
Clipper brush, oil, blade wash/cooler if you feel fancy
A dry, clean (preferably freshly bathed) horse
Tape or chalk if you are worried about getting lines correct
Approximately two hours of free time

I like to give a bath the day before and make sure the horse is nice and clean, and dry. A wet horse dulls your clipper blades - and so does a dirty one. I usually spray the horse liberally down with a shine spray before hand to make the hair optimally easy for clipping. I find that using body markers works best and ends up looking nice and symmetrical- meaning that I measure distances using horse's body marks. This works especially well for doing necks and throat areas.

The clips I do are either a modified irish, or bib clip that goes up higher than this picture:

But doesn't clip the shoulder, which I like to leave hairy for blanket rub reasons.


Last year I ended up doing a somewhat whimsical interpretation of the below, low trace clip. It got kind of out of hand... 


The hips got a little high, and I squared off the front, but I think it was kind of cute! It was definitely nice to be able to pull my saddle off and have a horse that was exactly as sweaty as she was in this picture. Not bad, huh?

When clipping, always go with the grain of the hair. Hips and whorls are hard, because the hair goes in all directions, and I think that's why my hip clips got a little crazy. Go slow, give yourself plenty of time, and remember, you can always leave a job partially done - you could even be nice and make sure the blanket covers the undone spots so your horse's friends don't laugh at him. I always try to wear something slick that hair will slide off of, and good light really helps to keep you from getting too close and inhaling your horse's hair. Velcro, or wearing a polar fleece jacket is a bad idea if you ever want it to be clean again...

Also, remember that you are taking your horse's natural blanket away from him when you clip (even if it does make him more comfortable!) and have a selection of blankets on hand to keep him warm in all conditions. Foxie didn't get clipped until November, and I try to resist touching up in January or February. She went on a coat supplement (Smartpak's Smartshine) in the late winter as a shedding helper, and I have never had her shed out funny, or felt that it messed with her coat. If your horse starts coating up in early October, I'd give him a few weeks to get the coat started, then clip, and let the rest of the coat grow in, so you don't take too much off, but still get the relief of clipping.

See, not too scary, huh?

Ashley & Fox

Wednesday, October 24, 2012

Coolers and Dealing with MN Winters

Coolers are a man's best friend in MN. I use them in combination with quarter sheets to help keep my horse warm before and after exercise. I don't think they were meant to be used like this:

Why buy a high neck cooler when I can improvise and embarrass 
my horse more than a mom waving from a mini van? Yes, this did get posted on facebook! 

No, I do have a plan to the madness. I have two coolers, as I mentioned in the last post; net mesh and fleece. I like to have two for those late fall baths when I don't feel good leaving her uncovered, and if it's a bath, she's wet enough to need a swap as she dries. The net works well for when I want something between the horse and the elements - I want to keep muscles warm, keep bugs off, etc. The fleece I use to give the moisture somewhere to go, and to keep the horse from cooling down too quickly and shivering. I don't like to put horses away wet. Perhaps it's my traditional training, but I can't bring myself to do it. Even though I was good and didn't, my mare still got the most impossible case of rain rot from wearing a wet blanket for too long - moisture, plus heat, plus dark equals IMPOSSIBLE to get rid of the critters once they get started.

So let's not let them get started.

Foxie did well clipped at the last barn, because it was heated, and sometimes her blankets, to be turn out appropriate, were too warm for the barn. With her belly and neck base clipped, she wasn't nearly as sweaty under the blankets, and not nearly so sweaty when I got off after a ride. I don't clip too short - just enough to be a little shorter than a summer coat, since the winter coat is bushier. Most rides, as long as I took a few laps walking with my girth loosened, I would end up with a mostly dry horse. A little bit of toweling and back and forth combing later, I had a dry horse to re-blanket and throw outside. 

Perfection.

The cooler wicks the sweat away allowing the horse to dry more quickly, but keeps them warm so they don't get chilled.


The quarter sheet works much the same way, allowing the haunches and back to be kept warm during a flat ride. Foxie is a cold backed horse, meaning that she is always a little hot to trot when you get on due to some back discomfort, usually due to her refusal to work in a frame and grow a topline. Once she did begin to build her topline, the quarter sheet was a great tool for warming up and cooling out, as it keeps the chill down, and keeps the muscles from cooling too quickly or being too stiff warming up. I usually do my grooming, throw the quarter sheet over the haunches, saddle up, pull the sheet forward and tuck it up (mine is square and I can't ride with spurs unless I tuck the ends under the saddle flaps, unlike above).  This tactic of pre-warming and cooling out makes so much sense when I began to do it on myself - seat heater before a winter dressage lesson meant I was less stiff in the saddle, and was able to stay warm and ride more effectively, because my back wasn't tight. Magic! 

Conclusions? 

Coolers and, to a point, quarter sheets, are super useful tools. 

I wouldn't use one as a blanket liner, because Foxie got the static crazies and tried to tear her liner off - it ended up wrapped around her legs and trailing out from under her blanket, doing more harm than the layer would do good. 

Think about getting off of a work out or out of the shower and walking around a cool room, or outside, without a layer on to keep you from getting too cold, or something to dry you off. Not pleasant, eh? Horses run warmer than us, and they appreciate being warm! 

As always, make sure to give your horse EXTRA warm up time in the winter - stretching before you mount will help avoid a bucking, sore-backed horse, along with several walking laps, with an emphasis on stretching down to help avoid muscle stiffness or injury. Add several walking laps on a loose rein at the end of your ride, too! This will relax you both, let you cool down from your ride- and helps you work on that free walk that you've been getting counted down on in dressage :)

Straight from the Fox's mouth,
Ashley