Monday, December 8, 2014

Review: Ovation Kenna Country Boots

The Kennas have arrived!

I will put up a more detailed review as I wear them more, but here are some initial photos and thoughts from my first weekend rocking them.

Both photos show left, without Lederbalsam, right, with. 

1. I LOVE the color. The chestnut leather with the back suede is very stylish, and while they are still a country boot and have a tough sole and functional foot, I will not hesitate to wear them to work or around town. Some buyers have complained about the lack of finesse in the foot, but if you're into country boots, they look like, well, country boots.


Again, Before and after Passier Lederbalasm. 
2. The chestnut leather on my boots came a bit distressed, but is soft and good quality. The foot is stiffer and took about 2 hours of walking and wearing to get a crease on the top of the foot. Once the crease happened, however, they were much more comfortable. I expect that they will continue to break in, and will do so beautifully.


The boots have a small brass detail on the outside and the OV insignia on the outside of both heels. There is a leather stripe down the back, as well, which should help the boots stay rigid and not collapse too much at the ankle. The chestnut leather, as you can see, has a definite patina but the whole look is very classy. 


3. So far, these boots are super easy to wear. They do move a bit on my heels but the foot bed is narrower feeling than my Dublins. However, my mom, who struggles to get into her mid-height Dublin River Boots, found these boots easy to get into (she has an ankle that was broken in the past, and getting into her Dubs appears to take effort similar to child birth sometimes...) and promptly attempted to steal them from me. For myself, I might consider a heel lift or orthotic of some kind to cup my heel better, but that thought only formed after several hours of Christmas shopping at the mall. The boots also fit my calves easily and have an awesome plaid interior that is super cute.


More review-ness will come as I've worn them more!

A.

Tuesday, December 2, 2014

Winter Riding Gloves: A Comparative Review

It's that time of year again: the time to freeze your fingers taking off your gloves every three seconds because you can't function with them on.

I own a depressing collection of winter riding gloves, but my collection is your gain! Here's what I think of them:

Dublin Thinsulate Everyday Fleece Riding gloves: 


Fleece exterior, thinsulate lining, synthetic "sure grip" palm and finger protection. Cinch velcro closures at wrist.

These gloves are great for above freezing riding, but the fleece exterior is less than waterproof and windproof, and is a major downside during shedding season. They are warm and don't seem to have extraordinarily long fingers as some gloves do.

Finger Use Rating: 3/5, relatively dexterous but not waterproof, windproof or shedding proof.

SSG 10 Below Waterproof Glove:


Ribbed exterior and cuff, grippy palm with riding reinforcements and a thinsulate/fleece lining. Listed as Waterproof, I was unable to test that as one glove arrived with a hole in it (missed stitching). My gloves also have wrist hangers so you can feel like Ralphie in "A Christmas Story" with your gloves on strings.

These gloves were too bulky for me to do much in - they were okay for activities like throwing hay or other manual labor, but were too thick for me to easily use snaps, buckles or other finer tasks.

Finger Use Rating: 1.5/5, one step above mittens.

Heritage Extreme Winter Gloves:


These gloves are similar to the SSG 10 Below with their ribbed exterior and knitted cuff to hold out drafts. They also feature a cell phone friendly index and thumb in addition to the thinsulate and fleece lining and waterproof protection. I like these a little better than the SSGs, though I can't put my finger (nuk nuk nuk) on why that is. These gloves also have a super cool pocket on the back to hold a hand warmer - which is great, as those buggers can burn you if put directly on skin!

Like the 10 Below's, I found these gloves to be too bulky for riding - I really hate feeling like my reins are floating in my hands between layers of fabric, and dislike feeling like I have to keep a death grip on them to have any sort of feel. These are probably perfect for western riders who neck rein or for trail riding, but aren't good for arena, dressage or jumping work.

Finger Use Rating: 1.5/5, one step above mittens.


Mountain Horse Trail Winter Glove:


I think these are the ones I have, at least. I know they're Mountain Horse, and are very similar to ski gloves you'd find in a sports store. Mine have the Ralphie-style wrist strings like the SSG 10 Below gloves, and a similar knitted cuff. Microfiber-esque exterior, and a fleece/possibly loft lining means that they aren't particularly waterproof.

These gloves were heavy - I wouldn't consider doing anything but the most basic, no dexterity needed chores in them, and riding was completely out of the question for me in these. With waterproof options on the market, I'd skip these.

Finger Use Rating: 1/5, one step above mittens AND not waterproof.

SSG Fleece Lined Winter Gripper Gloves:

These were a super cheap whim purchase, and would be great for people riding in a heated or well insulated indoor - just a bit warmer than one's standard riding gloves, these are basic and have a cozy fleece lining. My pair were SUBSTANTIALLY too large and grew annoying because of it, and have since moved on to use by my mom who has bigger hands and longer fingers. Not waterproof or windproof, these are not appropriate for chores - and wouldn't hold up, anyways.

Finger Use Rating: 5/5, in the correct size, these gloves would be no different than a summer riding glove in my opinion.

SSG Pro Show Winter Glove:


These gloves are leather with a pinched back and feature stretchy lycra material between the fingers, giving them a good close fit. They have a knit cuff to prevent wrist drafts and are thinsulate lined. These gloves are a great balance between warmth and dexterity but do fail out on the colder days, especially if it's windy. They are not bulky and I can do bridle buckles up with no issue.  With the addition of the Ovations below, these gloves will be my gloves for temps around freezing and a little below.

Finger Use Rating: 4/5 - these are not summer gloves, but they have very low bulk and do keep your fingers quite warm.


Ovation Syntac Thinsulate Winter Glove


These gloves are my newest purchase, and I'm pretty excited about them. They are a bit heavier than the Pro Shows, but are still nice and grippy and pretty darn low bulk. The exterior is grippy and stays pretty clean. The thinsulate lining appears to be augmented with a soft fleecy lining. As of right now, I'm pretty thrilled with this find, and intend them to be my gloves for the colder temps. I rode in them on a 35 degree day in our unheated, uninsulated indoor and found them to be almost too warm which was a lovely surprise!

Finger Use Rating: 3.5/5 - these are not summer gloves, but they have relatively low bulk and do keep your fingers quite warm.


Hopefully these reviews are useful and I'll keep you updated on the new Ovations!
A.

My Boot Addiction

Riding horses has, among other weird things, taught me to appreciate good quality leather and construction. The leather on my Philippe Fontaine Royan is positively delicious and don't even get me started on my show boots, or my Courbette Vision, which will, I am convinced, be in use long after I am too old to post the trot. A love for good quality tack is one thing... but my addiction to nice leather has leaked over into my "civilian" life.

My first pair of "Country boots" as they're termed was a pair of Dublin River boots, and my experience has been relatively positive with them. They have a nice, wide foot bed and I've never had a problem getting my feet in and out of them. I wear them with wool socks and skinny jeans, and get endless complements while my feet stay warm and dry. 

I used my "Dubs" for: slogging through snow to college classes, as "every day" boots to wear around campus, to do quick runs to the barn, as my "grooming boots" before I changed into my riding boots, as rain boots and, of course, as fashion wear pretty much any time I'm not in the tack at horse shows.

These boots even made the journey with me to London, England to study abroad:


My first pair of Dublin River boots bit the dust (the heel cup broke in to pieces) after the London trip, and while I had them sewn to repair and cover the worn through and now broken heel, I replaced them with another pair. The second pair has been telling me lately that they're about to go, as well; they have lasted me about 2 years a pair when in regular wear. 

My overall opinion on the Dublins is that they would probably work better for someone with wider heels - my heels are quite narrow, and I have long, narrow, flat feet. The heels seem to consistently develop holes even when the boots themselves feel snug and I don't notice them sliding on my feet or heels. These boots are also susceptible to damp feet, which I think is what helps the lining come loose to begin with, and then the internal wearing begins. They are, all in all, a good investment for consistent, casual wear, but both wore through and began to look dry and began cracking (even with consistent use of Lederbalsam and cleaning) around the 2 year mark. 

This, of course, left me with a pickle: my boots are in the beginnings of death throes and I'm not sure I want to invest in another pair and watch then do the same thing.

I immediately began daydreaming about the Black and Chestnut Dubarry Galways; and then immediately almost vomited from the price. Currently, I use my country boots in the summers for horse shows (4 max a year) and for casual Friday wear in the fall, winter, and chilly spring at the office. Paying 500$ for a pair of boots that isn't used every day isn't something I can imagine myself affording any time soon. 

So I began looking at my options and I'm excited to say that I made a decision: the Ovation Kenna boots!


These boots were my Christmas gift to myself this year, and I look forward to reviewing them for you guys soon. I tried on the Caelin boots (black with plaid wool legs) and the Maree boots and found them both to run about where I expected:

My Dublins are 8.5s, or 40's. The 40's in both Ovation boots fit me the best, even though they say that a 40 is a size 9. The footbed seemed narrower than the Dublins, and the foot itself was thicker and more rigid. 

I'll put them to the pavement doing my Christmas shopping and throughout this winter and will get a review going soon - hopefully if you are considering a pair, my review and updates will help you decide.

Thanks!
A.


Monday, December 1, 2014

Giving Thanks

On this cold, blustery Cyber Monday morning, I'd like to take a moment to give thanks.

I'd like to give thanks for the followers and readers of this blog; without you, I'd be talking to the internet and it means so much to me to know that someone, somewhere out there is hearing me.

I am thankful for my girls, my four-legged kids, and the lights of my life. Foxie and Bailey are true blessings to have in my life. Bailey has come so far in the last year, and Foxie continues to age like a fine wine.


I am thankful that I have been able to continue this passion into my adult life, and am surrounded by people who want to help me keep my horses in my life, even as "grown up" life demands take their toll.

My life is on track to change coming into the next few months, but in a way I can only see as positive - more on that as things solidify, but until then, look forward to more product reviews, horse care thoughts and, of course, madness from yours truly.

Happy Holidays!


Thursday, November 20, 2014

How To Survive the Polar Vortex: Rider Edition

If anyone reading this actually knows me, they will know that I am a freeze baby. I am cold all the time, and wear more layers than any person has any right to. BUT I did survive last winter (may I remind you, the -35 degree "feels like" and the wind so cold you couldn't have your face uncovered) with all of my fingers and toes. For a minute there it was tense, but with some thought and new winter boots, I SURVIVED!


Much cold when riding outside on a "nice" day.

Here's how I did it:

Baselayer: 

I start with Cuddle Dud long john bottoms, or, if it's legit freezing, I bump up to my Columbia Omniheat baselayer (Omniheat is the best. Seriously.) with coolmax base layer socks to hold them down. I also usually rock a Cuddle Dud top, or, again, the Omniheat (mine is a mens, but #YOLO) should it be legitimately too cold to function. The Cuddle duds are wicking, warm and the 360 degree stretch gives you a great range of motion, and they're pretty affordable, too!

Mid layer:

I add a fleece layer next; usually a Columbia zip up fleece and Kerrits Sit Tight and Warm breeches. I am a Kerrits ambassador, yes, but I sincerely LOVE these breeches (and the discounts Kerrits gives me ;) ). I walked out of the barn, bracing myself, the first time I wore them, for the wind to blow through them and steal every iota of body heat from my lower extremities. And I felt... nothing. Windpro fleece blocks the wind, and the seat is super sticky which is wonderful when it's freezing and muscles don't work. Over the breeches, I usually wear REI mereno wool hiking socks (they come in different weights, but I prefer to go for the warm ones!) or Smartwool knee highs, which were a gift last year. I love them, and they have Koi on them and they're just so cool.

Outer layer:

My riding jacket is my old college jacket - a Columbia interchange with a windbreaker layer and inside, a puffer type jacket with omni heat. As you can tell, Columbia has worked out really well for me - if I don't wear the omni heat jacket, I have another Columbia that is oversized that I wear when I need to be active and have room to move. If you have a jacket you like, maybe try an Omniheat vest. which is also one of my favorite layers.

For boots, I have my new Ariat Brossard boots (link to my review post), which I put toe warmers in. The thinsulate lined foot and leg are the winning factor with me - between them, and the wicking coolmax socks, my feet stay warm and most importantly DRY should I cold sweat or overheat. Dry feet are warm feet, remember that. I bought mine through Amazon Prime and paid 150$ for them (just watch the prices - a deal will come along!!).

For gloves, I'm at a bit of a loss. I really like my SSG ProShow winter gloves, which are again fully lined with thinsulate. They're flexible and I can actually do buckles and ride in them without feeling like I can't feel the reins or function. They are not amazingly warm, but they hold their own, especially because I don't have to pull them off every two seconds to do a buckle or use my fingers. Otherwise, if it's dry, I will double up on the $1 cheapo gloves from Target or where ever - I tend to go crazy buying them up when they clearance out in the spring, and I get to indulge my love of crazy colors in the process. Two layers of them blocks the wind better, and you can strip off the top pair should they get wet and your bottom layer might still survive.

I also sometimes throw on a neck gaiter, especially if the wind is super cold. I pull it up over my face when I'm outside. When I rode outside full time many-a-year ago, I'd ride with a full balaclava on under my helmet. And while you look like a ninja, your face is warmer and your snot doesn't freeze to your face. It's the little things, right?


I have Helmet ear muffs in my helmet and they actually work great - when I'm not mounted I wear an omni heat hat, and it is legitimately worth it's weight in gold, plus more. The minute you put it on it goes to work reflecting your heat back at you and keeping you warm.

Seriously, I'm obsessed with Omniheat - some of it is pricy, but you can find it at Columbia outlets or online (Sierra Trading Post FTW) for pretty reasonable prices. And it's worth it. So, so worth it.

Stay warm, my friends. 

Wednesday, November 19, 2014

Blanketing 2014: The Yearly Update

This morning it was a delightful 7 degrees with a -13 windchill while I scraped my car with wind blowing up the back of my knee length jacket and right through my work skirt and fleece lined tights. It's winter, guys.

It came early this year, much to my chagrin. I can tell that winter is surfacing in other places too- my blog gets hits for clipping patterns and blanket questions. If you've found this page while searching, welcome! I feel the need to revamp and reiterate winter concerns every year, it seems like.

PSA:

Last winter I saw a "study" posted on FB on my barn's homepage that stated that horses don't need blankets because they inhibit the horse's hair from standing up in (approximately a bazzillion) different directions to keep them warm, etc. etc. This is a hoax. Please don't spread that article around.


The Wardrobe:

Each of my girls has their own:

Fleece cooler - for post ride cool down and to prevent chills as they dry
Waterproof T/O sheet
Waterproof T/O blanket - Medium/220g with hood
Waterproof T/O blanket - Heavy/360g with hood

They also have a shared collection of liners and spares:
2 Schneiders blanket 180g liners
1 Rambo Optimo 100g liner
1 80g T/O blanket (no hood)
1 220g T/O blanket (no hood)

Right now, I think of sheets as a 1-2 year investment, as they wear them when it's sunny and they take a beating with rough fall and spring play, mud, etc. I also prefer that my sheets be as waterproof as possible, and waterproofing, no matter the quality, seems to diminish with the fabric quality. My sheets were new last fall but are already looking pretty rough. However, since I got then on sale for a great price, I don't mind replacing them - probably with the same model!

Medium and heavy weight blankets are also big on being rain and water proof, but I tend to think of them as more of a snow blanket, and these blankets get worn the majority of the truly cold season, thus the draw of the hoods for extra warmth.


For turnouts, I look for a denier 1200D or higher, and make sure what I get is a waterPROOF blanket, not a water resistant one. I like slick liners on my blankets, which helps keep the coats happy and prevent static. I also prefer leg-and-belly-strap variety blankets over ones with a tail strap (i.e. Horseware blankets), especially after watching another boarder's horse completely undress herself of both her turnout with belly straps and tail strap, as well as the stable blanket underneath in less than 15 minutes. I also like that I can cinch the leg straps down on really windy days to help keep the blankets from ballooning from a tail wind.
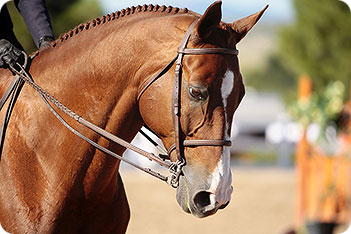
Features wise, I LOVE quick clip fronts, reflective something is always nice for when it gets dark so early, and I dearly love neck covers that attach with velcro, like the Weatherbeeta Detach-A-Neck line (shown on both girls - Foxie is rocking an WB Orican, Bailey a WB Original). They shift and turn less than neck covers that attach with surcingles, and have less of a problem falling up a lowered neck/gapping, plus there is no way a horse could get his hood over his head and hurt himself.

The Temperature Guide:


It's a source of anxiety every year... but here we go. I've compiled a few "opinions" from different sources, and looking at the various blanket guides provided by equine supply companies, equisearch, horsechannel.com and other places, it's honestly pretty confusing.

Take a 40 degree day, like today; some guides say a light (100g type) blanket. Others say a medium. One guide even says nothing at all. HUH?

60 degrees and below with wind/moisture anticipated will have me pulling out my light sheets - especially if my girls are still in their sleek summer coats. They have been wearing the sheets off and on as their coats have been coming in, and should be warm today with a high in the low 50's, some rain anticipated, low of 21 when they will be in the barn. I'd love to have mesh lined sheets, which I think do a bit better job of breathing when things get a bit warmer than anticipated, but the nylon lined ones I have do just fine. 

When we hit mid-low 40's during the day, with cold temps at night, I will add my liners to make light weight blankets out of my sheets. Especially for Foxie, who runs cold, this adds a nice layer of comfort on the inbetween days. 

Come the mid-30's, we'll pull out the mediums. If its sunny, they may not wear their hoods until things go below freezing. The mediums get a lot of play on the ends of the season, and work as a sub for a heavy with a liner underneath. 

Around the teens, I start dragging the heavy weights out, and go by feel from there. Last year, with the arctic vortex causing -35 degree temps with wind, both girls wore liners under their heaviest blankets. Foxie has a new heavy this year, which should be a bit warmer than her older (now Bailey's) heavy, as the filling is fluffy and unwashed. Her old heavy weight blanket has been hand-me-downed to her baby sister, who won't miss the extra warmth - should we experience another ice age, she always has liners to layer under her blanket. 

Temperature wise, I always like to test ears for warmth and take off my gloves and feel shoulders under the blanket, then the back, and then reach under to get a back and rump temp. I prefer my girls to feel pleasantly warm to bare hands without feeling too warm or damp. Foxie is winning the coat growing contest this year, as Bailey has hardly begun at all. I'm waiting to clip her until she needs it, as she takes only 15 or so minutes to cool out under her cooler, and usually only sweats after a hard lesson with our trainer  - I don't work her that hard! The girls are both wearing quarter sheets in the arena, as well, to keep off the chill.

Blanket care wise, I would have your spares within easy reach all winter in case you come to the barn to a soaked horse. Good blanket care includes washing the blankets at the end of the season (don't wait until it snows the next year, EW!) with appropriate soap. I have Weatherbeeta brand blankets and use Horseware blanket wash on them to preserve their waterproofing. For big repairs, I use a blanket repair service or seamstress, who has the heavy duty sewing machine to handle the job. For small repairs (my blankets get a lot of punctures, it seems), I have been using Tear Mender and have been happy with the way it seals punctures and sticks to the blankets through washing. 

Clipping:


I firmly support clipping your horse if they are sweating in their regular work. My favorite clip to do is what I call a "Modified Irish" which takes off hair on the bottom of the neck, down between the front legs but leaving the shoulders, and then, at the girth line, popping up to the elbow or above and slanting downwards from there. It takes me around 45 minutes or so to do with my Wahl Show Pro clippers (they are small, but don't heat up very much or make a lot of noise or vibration). I like this clip because it is easy to use the horse's body as an indicator for the heights of things, making it easy to get relatively symmetrical on either side.

Take this clip, minus the shoulder, high neck and face, and you've got my "Modified Irish" 

Obviously, the more your horse sweats, the more hair you need to take off. And the more blankets you will need to keep them warm, because you are stripping the horse of his or her natural protection against the cold. As a Minnesotan, I DO NOT clip the face. I will clip off the "beard" and will continue a clip up under the jaw, but I won't take hair off the face. It's too cold, and face slinkies always seem to get caught, pulled over eyes or other bad things happen. I also leave a strip on the belly below the "edge" where the hair is easily seen - my blankets don't have a belly wrap and behind where the girth lays, I like to leave some hair - plus, the belly always seems to be full of dander (I think I've found a hole in my bathing regimen...) and the hair is long and extremely thick. I'd rather leave it and give my horse some areas to "vent" the heat.

I don't want to go through all of the clips again, but hopefully if you have questions, you'll comment - I will get back to you ASAP!

Have a good winter, folks!


Thursday, October 30, 2014

So You Want to Become an Equestrian: Riding Lessons

If you are new to horses, you'll see this sentiment again and again on the internet, as well as here on my blog; if you are new to the world of horses, take some lessons.

In my previous post, I mention the adage "You don't need a $35,000 horse, you need a $1,000 horse and $34,000 in lessons" and once again this is so, so true. Finding the right sport, instructor and program can, however, be a challenge. Here's my insight:

1. Decide what you are interested in. Sounds simple, right? Know yourself, and your preferences - if you're nervous at first, even if you want to learn to jump later, taking some lessons in a western saddle,  which to many feels more secure with a horn to hang on to, might help you build your confidence. I, as a young kid, fell in love with jumping horses, and while I didn't know it yet, I was actually watching the sport I'd end up in, three day eventing. Choosing western or English as a riding style is the first step to looking at places to take lessons. Some barns do offer both, so be aware of that, as well.

2. Scope out the local riding lesson scene. I would read reviews, and look at a few barns that offer the style of riding you prefer at the moment, even if their lessons turn out to be too expensive for you. Taking tours and talking to the owner or trainer about their program is also a good step at this point. I would search for a program that offers 45 minute - 1 hour lessons with a set instructor in a private or group setting. I would also look for a program that offers horsemanship training (see #3) and has a trainer that you feel comfortable with. I would also look at the horses and facility. The horses should be well cared for with no ribs showing, and shouldn't be upset or sour towards people. The barn setting is up to you - as a parent, a viewing lounge with heat may be a great asset to a program, while other barns may not have an indoor arena at all. I've ridden at barns with great facilities but sub par care and teaching, and I've also ridden at older barns without indoor arenas that have offered great instruction, but facing down winter weather outside as a new rider may be more of a challenge than you would like to take on.

3. Find out what the program entails. I would suggest a program that offers horse care knowledge as well as riding - one where you learn to groom and tack your horse, as well as ride it - as this will give you a stronger base in horses as a whole, and will help prepare you for being more involved in the future if you choose.

4. Be prepared. Check with the lesson barn as to if they offer boots or helmets for the first few rides; if you are going to take lessons regularly for more than a few weeks, I would suggest searching for affordable boots and helmets all of your own. Here's my tips (for English riders, sorry, Western folks!)

Boots - paddock boots are the short boots you can find with a zipper or lace up option. They come in leather and synthetics in a range of prices - I would suggest finding a pair you find comfortable. Brands like Ariat are reliable classics, while Dublin may be a good budget brand. For a new rider, tall boots ARE NOT NECESSARY and won't be a good investment until you are riding very regularly or showing, as you will build leg muscle and outgrow your boots.

If you find yourself wanting extra grip, the tall boot look or just another layer over the stirrup leathers, try an inexpensive pair of half chaps. Half chaps come in fun colors for kids and can also be washable which is a great asset. Don't ride in fashion "riding boots" or anything with a zipper on the inside of your leg - this can be very painful and could easily damage the tack you are using, or open the door to other problems, like your toe going through the stirrup because you don't have enough of a heel on your boots (tennis shoes also have this problem).

Helmets - helmets come in a range of prices, but should be properly fitted by a professional until you or your rider knows what feels right. There are many stylish budget models that won't put you out too much money should you lose interest. Helmets should be snug and shouldn't move or bounce on the head - but a too-small helmet will give you a headache! Brands do make helmets for different shaped heads, as well. I have a more oval head, and prefer helmets that reflect that shape as they fit laterally on my temples without being too small front to back.

Breeches - breeches are a great investment in comfort for riding versus jeans, and can be found in many styles and colors, and some are quite affordable. They come in basic knee patch styles, and as you advance you may grow a preference for full seat breeches, which have grippy material on your seat as well as down the inside of your legs.

Tack/saddles - some of you will want to begin your collection of horse stuff NOW. While a halter and lead rope in a generic size may be useful, buying grooming tools isn't a good investment because you shouldn't use them on more than one horse to prevent spread of skin gunks like fungus between horses. Saddles are similar, and should be fit to the horse they will be used on and won't fit several different lesson horses well. Ask your trainer if you are looking at purchasing a saddle to get their honest opinion; if they can help you find a saddle that will fit YOU better than a lesson saddle and will not cause their horses discomfort, you may be in business. Other items should also be bought and used at your trainer's discretion - including treats, as some horses can't have a lot of sugar or extra calories.

5. Have fun! Learning to ride can be a lot of fun, and open the doors to a passion that can stay with you your whole life. Enjoy, and learn!

Tuesday, October 28, 2014

New Horse Ownership Challenges

So, as I warn you guys over and over again, this blog is basically my personal mouthpiece on horse ownership and horses in general. I've been riding and caring for horses for 15 years, and apparently that makes me an expert. Recently, as we've had some boarder turn over in my barn, I've been witness to some really interesting... theories... on horse ownership. This is also known as someone went and bought a horse, and they don't even know how to put a halter on, much less ride or handle a 1,000+ lb animal safely.

There is a saying in horses that most people don't need a $25,000 horse - they need a $1,000 horse and $24,000 in lessons.

And I agree.

I took lessons at a variety of stables from the age of 8 - 16, when we finally purchased my first horse. At the point of that purchase, I had taken said horse from a skinny abused horse no one wanted to ride and had  done all of her retraining to make her one of the nicer horses at the barn. Find a trainer you like, you can trust and who runs a good facility - I'll lay out some tips for choosing a lesson barn in another post. If you are a green, or new rider looking at buying a horse, or have just purchased one, I'll ask you to think this decisions through really well.

Horses live for 25+ years in most cases, and as long as they are yours under ownership, they are your responsibility. This means you need to account for many years of the following:

- Boarding costs or daily checks if the horse is on your property.

Many horses can live comfortably in a field with shelter, hay/weed-free pasture and fresh water, but others may need a stall to protect them from the elements. Trees do not count as acceptable shelter in my opinion.

- Hay, water and, usually, some type of feed.

Horses have base nutritional needs that often cannot be met on pasture or hay alone. Ration balancers are available to give the horse the nutrition they need, or there is a variety of horse feed brands and types for horses who do not gain or maintain weight as well as others. Horses also need fresh, clean water, a fiber source like hay or pasture and most feeds will suggest offering your horse a source of salt for their consumption.

- Routine and emergency vet care

Horses need vaccinations each year, and also require a coggins test to be out and about with other horses at shows or in parks for trail rides. This prevents them from passing dangerous diseases to other horses and prevents them from becoming ill or dying because of one of those illnesses. Horses also need their teeth floated periodically to ensure that they can eat, chew and wear a bit comfortably for riding. If their teeth do not get ground down, horses can die of starvation because they cannot chew and process food. Teeth grow the horses's whole lives, but do sometimes slow down in older age - this is usually a yearly expense, with normal routine vet visits being twice a year. Emergency care should also be accounted for if your horse becomes injured or ill.

- Farrier work and other maintenance

Horses hooves also grow their entire lives, and need to be trimmed by a qualified farrier approximately every 6-8 weeks. Horses spend 90% of their lives standing or walking on those hooves, so they need to be kept at a comfortable length to prevent injury and ensure the horse is comfortable. Some horses may need shoes, while others do not, but shoes do present other potential issues and raise the cost, so unless your horse needs them due to excess wear on their feet, or soreness when ridden, try to stick with a bare foot. Other maintenance includes deworming every 8 weeks or as needed per your vet's assessment, hoof picking and generally looking the horse over for injuries and illness. Some horses have sensitive skin and develop fungus or other skin ailments which will need treatment and care, while others may pick up injuries in their pastures that can be attended to by their owner.

Horses may also need a winter blanket when temps turn cold, if they are skinny or don't grow enough hair to stay warm. Horses can be susceptible to cold winds, rain or heavy wet snow, all of which can compromise their ability to stay warm, even if an outdoor shelter/windbreak is provided. If you ride them in the winter, it's your job to ensure that the hair your saddle and bridle smooshes down is fluffed back up, and your horse is returned to his paddock or pasture dry and well prepared to protect himself from the elements. Many breeds are not endowed with acceptable winter coats for Minnesota winters, and my personal horses require several different weights of blanket to battle the temps.

- Lessons, tack, etc.

If you're a new rider, a few lessons AT THE LEAST should be in your budget. While some riders pride themselves on doing all of their training themselves, lessons will help you learn to ride your horse as well as maintain basic care and handling of your horse. Most people ride with tack, which needs to be properly fitted and in good repair. Seriously - find a trainer, and have them assist you when going through the process. Illfitting tack can lead to behavior issues, bucking, rearing and other dangerous behaviors, even if your horse is a saint. Many students take their trainer with them when purchasing the horse, as well, to ensure the animal is appropriate for your needs. While I LOVE spewing horsey information on the internet, I am a bear at the barn and do not appreciate being guilted into helping some weeping new horse owner whose horse got a little pushy or did something naughty. Get the help you need, but don't expect it to be given without a price in most cases.

Then you get into things like transportation, shows or trail riding passes, emergency vet bills, etc. etc. etc....


Now that I've done the fear tactics, I can tell you horses are amazing. They are rewarding, and help define you as a person. They are my four legged children and best friends. We have the most wonderful adventures together, and together, my horses give me wings to fly and do the sport I love. Horse people are often just as fantastic as their horses. Horses save lives and are fantastic therapists for all - having them in your life is a gift.

Just think about how much you want them in your life, and if you can afford it, first. 

Review: Ariat Brossard Tall Boot


These boots are the best on the market, hands down.


Follow up - Almost 1 year later: I popped these boots on for a chilly morning clinic about a month ago, where many of these photos came from. After riding in my Ariat Breeze Half chaps and Mountain Horse show boots all spring and summer, these boots felt a little lose in the calf. I probably have also lost some weight, and was wearing a few less layers than usual. The ankle is also a bit of a shock after being in a tight ankled boot for so long, but they were comfortable. I will probably want to use some saddle tight especially on my smooth jumping saddle (pictured) but again, I think with some muscle increase (I know I've lost muscle in my lower leg... it swings like crazy all of the sudden) I'll be tighter in the tack. 


Insulation: Thinsulate is the best you can buy - not too warm that your foot will sweat, but has kept my frostbitten-in-the-past toes warm in Minnesota's Artic Vortex -20+ degrees with windchill cold with wool socks and a toe warmer. In warmer areas, I anticipate these will be warm without being too warm. They are insulated all the way up the leg.

Fit: Foot is spacious - I wear a 9 in the Heritage Paddocks and a 9.5 in these boots. My older pair of Ariat winter boots (10 years old and still kicking - not water proof above the ankle but still great boots) are the same foot size and I found the toe to be more spacious in these, which I like. I like being able to move my toes and the space provides more area for the heat to build up. I wear mine with one or two layers of socks - smartwool alone or with a coolmax liner sock, and have been using toe warmers. I wear a M (14 1/2 - 15 1/2) in the Ariat Breeze half chaps and these boots were snug on first zipping but are comfortable and stay up nicely. They do seem to have stretched slightly so there may be some leeway.

Height: These boots are shorter than my usual taste in tall boots but have not caught on my saddle flaps in short, medium or dressage length stirrups. The heel does seem slightly higher than usual for boots, but they are not uncomfortable.


Materials, Aesthetics: The materials are quality and should last for a long time. I like that they are suede and leather, not synthetic, which has cracked on me in the past. The leather foot is water proof and there is a membrane in the foot which crosses the zipper around the ankle - sometimes the zipper catches here, but usually I just change the angle (put my heel down) and the zipper glides smoothly. The ankle is flexible and I am able to wear spurs and use them with finesse because I can feel and move my ankles. Inside calf is grey suede, which I believe I will rub smooth in the future but don't foresee it degrading or developing holes. Some of the nylon parts (outside of ankle, top) is a slightly purple hued grey, but the boots are not PURPLE as they look in some pictures. Zipper is quality and doesn't catch except sometimes around the ankle membrane, which is easily resolved. These boots are waterproof but I wish the zipper was wholly waterproof as I've stepped in some deep drifts and felt a bit damp because the snow was above the waterproof membrane.


I did think they looked a bit clunky on others, but love them as they are warm and not clompy/heavy/oppressive to wear on the ground or in the tack. The round toe still allows for a narrow profile and I have never had concerns that these boots will catch in my stirrups as other brands have. I was dragged in another brand of winter boots several years ago after they turned and wedged in my stirrup after a fall. I have never felt these boots get stuck or wedged, but still ride in break away stirrups in winter as a preventative. Comfortable on the ground and to ride in, I am recommending them to anyone who hates cold feet but wants to ride or work through the winter

Tuesday, September 16, 2014

Monday, July 14, 2014

Bit Basics #3

We're going to reach out now into the arsenal of other bits out there in the world. And jeezy creezy there are a lot of them!

I break the bigger bits down as follows and will continue to edit and update this post as I work through each of the categories, as this post will (eventually) be monstrous!

Pelhams:


Pelhams can be a great move up from a snaffle, but in their best usage do require educated hands as two reins is usually preferable. You will see roundings between the two rings as shown below, but I think the pelham can be much more subtle when you take the time really learn how to ride with two sets of reins.


Pelhams have two basic actions - the "snaffle" and "curb" just like a double, but are obviously less refined aids as you are doing two actions with one bit. I like the pelham for a horse who needs an occasional extra "woah", as you can ride off the snaffle and only use the curb when needed. Pelhams become stronger depending on the mouth piece and the length of shank. The shank obviously gives you a longer fulcrum from which to pull on the poll, tongue and bars of the mouth thus increasing your strength (think of pulling on a well handle from the top near the hinge versus the bottom of the handle - it's much less force to grab the bottom and use the leverage). The more joints there are in the mouthpiece, the more it will collapse in the horse's mouth. Combined with the action of the curb chain, the pelham can be used artfully to give you the control you need, or it can be used to mercilessly destroy your horse's mouth. This article makes a great point and is definitely a highly encouraged read - go HN!

Kimberwicke bits:


A ported Kimberwicke with slots

Kimberwicke bits are a leverage bit with a D ring type side. It uses poll pressure behind the horse's ears combined with a curb chain to provide the rider enhanced stopping power and control. Kimberwickes come in several mouthpieces, but I often see a ported mouth piece as shown above.. They come with smooth or slotted sides, which impacts  the amount of leverage you have.I have heard the bit referred to as a "pony bit" but find in my experience, it's a lot of brakes often used with very little finesse. Here's a diagram, but I suggest the foot-and-pull testing method to see if your aids really are as light as you think ;)


Ported Bits:

Like the Kimberwicke shown above, a port is an inverted U shape of varying size in the center of the bit mouthpiece. The concept is sometimes described as giving tongue releif for horses who struggle with pressure on their tongue, while others see it as a way to put pressure on the roof of the horse's mouth. The higher the port, the more damage a yank (accidental or intentional) can do as the port rotates to contact the roof of the mouth, especially when used with leverage like a shanked bit or one with fixed rein placement.. Ports come on a variety of bits, from snaffle Dee rings to the elaborate western bits used for shows.


Gag bits, in sub categories: 

Gag bits are united by the presence of leverage, often with a snaffle type mouth. The leverage is achieved differently for each bit. I have been seeing a lot of gags on the XC course lately, so perhaps they are in style. Either way, leverage bits act on the bars, tongue and poll and are usually what you turn too when a snaffle isn't enough. Many of these bits can be used with a "snaffle" rein, much like a pelham, but you will also see bit converters or one set of  reins only on the leverage portion.

Cheltenham Gags

The Cheltenham is a gag bit built, in a way, on an eggbutt snaffle base. The cheltenham uses a cheek piece that passes through two loops or holes in the bit's ring, which allows the cheek to slide through the bit when rein pressure is used. A "snaffle" rein can be attached to the ring as you would with a regular eggbutt bit, and you can find a variety of mouthpieces. When the bit slides on it's cheek piece, poll pressure is increased, and the bit will also act act on the corners of the mouth. I used this bit on my now-retired OTTB eventer, Foxie, and found it to be a nice happy place for her between a snaffle, and no control, and a pelham, which, when she was very fit and schooled, was too much and too much rein for me to handle XC.


Balding Gag

The Balding gag is a slightly harsher cousin of the Cheltenham, in that the Balding gag is built on a loose ring snaffle. However, because the rings rotate, I consider this to be harsher. You will also see the ring size increase, which creates more leverage than a non-turning eggbutt snaffle ring.


American Gags


American gags are a longer, shanked gag bit. While others have the leverage of the rope cheeks sliding through the bit, this bit offers a long shank and a short slide, making it a "faster" type of gag bit. Cheek pieces attach to the top loop, and reins to the bottom loop, and the bit slides on it's leverage as the rider tightens the reins. I have not seen an American gag using two reins, or roundings between the two loops, though I am guessing it could be done. Again, with the rotation like the balding gag above, plus the added leverage of the shank, I would rate this as harsher than the balding gag, and a bit that should only be used by educated hands needing some pretty major brakes.


Pessoa  Gag / Wonder Bits

Hack Gags

Elevator bits:

Hack Combo Bits, Mikmar Combo bits, and other things

Hackamores

Hooked Bits

Buckle up, it's going to be an interesting ride!


Friday, June 20, 2014

A Peek In My Tack Trunk: A New Series!

Hello, Keep Calmers! 

In an effort to keep writing and to get some new and interesting content out on the intarwebs, I am going to give you a peek into some of my favorite products each Friday. I am always on the look out for good deals, good quality and great innovation when it comes to horse products, and hopefully my insight can be helpful to others. 

Today's product: 

Kerrits Flex Tight Full Seat Breeches

I am a Kerrits Brand Ambassador because of these breeches - and I'm not kidding. I rode for years and years in basic cotton pull on type breeches and was leery on how much movement I could pull off with a traditional suede full seat. Luckily, Kerrits came up with this awesome product, and I now happily own a few pairs of the light weight Flex Tights and the cosy winter Powerstretch breeches. 

Both of these breeches feature a slightly stretchy, segmented full seat made of Kerrit's amazing Gripstretch Suede. This synthetic suede is easy to wash, holds up to long hours in the saddle and endless abuse and gives you the perfect combination of comfort and grip while still allowing you to move. I am pretty upset that Kerrits has discontinued their ribbed fabric, but still love the breeches for their comfort and design. These breeches are a pull on style with a wide elastic waist band, 1" belt loops, small pocket on the thigh and elastic ankles, and come in lots of fun and flattering colors. My only wish is that they would make them out of slightly more durable fabric, as my show pair has developed a hole. Admittedly, I have fallen twice in that pair, but I would appreciate a thicker fabric in general to better conceal any lumps and bumps. 

These breeches are my favorite for competitions and cross country schooling in the summer due to their fantastic gripy fabric that has never been "too grippy" the way saddle tight can sometimes be. The winter version is better for early winter into spring, as I use the heavier Sit Tight And Warm breeches when it's very cold and windy here in Minnesota. I like full seats in the winter, as when you are riding cold I feel that my grip is sometimes impacted by cold muscles, and my reactions are just a little bit slower - the extra grip is a nice help especially on a cold, spooky baby! 

Here are some shots of these breeches in action:


My favorite pair - love the black full seat! Plus, it makes for nice pictures of the seat configuration. 


Keep calm! Ride on!

Ashley

Friday, April 4, 2014

Philippe Fontaine Royan: Review

So I bought a new saddle. That brings the total up to four, and I have a feeling they will become my kryptonite. I am crazy about saddle fit the same way I am crazy about shoes - not because I love shoes, but because a well fitting pair of shoes makes life livable.

The Royan was bought to replace my beloved Courbette Baron Von Trenk, which I plan on keeping as  A) I love it and B) Most people would not see the value in a short billeted, hard, flat dressage saddle. It may not fit either of my girls again, but I don't want to give it up just yet.

The Royan came onto my radar after I googled "E-motion tree" in a frantic attempt to find a used Courbette dressage saddle with the same flex tree as Foxie's Courbette Magic AP.


Let's just say, one of these things looks awfully like the other. 


I haven't ever ridden in a Courbette Magic Dressage, but the AP looked - and ended up riding - similarly enough that I feel like my gut instinct (and the fact that they have almost exactly the same description) was true - the Royan is pretty much a Courbette flex tree saddle in a pretty calfskin wrapper. The Philippe Fontaine saddles are distributed by Stubben and I've ridden in it 3 or 4 times now

Materials:
The Royan is intensely, gloriously soft. The leather is soft grippy and looks to be calf skin, though I haven't confirmed that. I'm using calf skin leathers on it from Smartpak and would be cautious using anything but the softest leathers you can afford on it. 

The panel is "Memoryflex foam" which is also nicely soft and squishy. The panel on my Magic is foam as well, but is much harder - not sure if that is how the material ages or if this is a change Stubben made. 

The billets were super stiff leather that was very different from the other materials - I used copious amounts of Ledersoft and Neatsfoot oil on them and they are now willing to tuck into the girth keepers, but are still a work in progress. I didn't even bother oiling or conditioning the rest, as I'm still figuring out how to care for the calfskin. 

(Edit: Due to lots of squeaking, I got brave and got out the Passier Ledserbalsam and gave it a light coating, and stuffed Effax Ledersoft on any of the exposed non-calf parts, including the underside of the jockeys covering the stirrup bar and under the flap. Squeaking has been resolved, and the calf seems quite happy from it's coating of balsam.)

Stitching is even, but on close scrutiny/peering up under the flaps I do see some staples where on my older traditionally made dressage saddle I see stitching. The Royan has a single, subtle stitching detail on the flap and features (rather large, for my taste) buttons with a fleur de lis on either side of the pommel.

The saddle is very light because, I am guessing, the composite tree and foam panels. As a warning, the stirrup bars are composite, as well. This is different from my magic, but they feel secure and I have no reason to doubt them at this time. They are the moving parts type with the end that flips up to secure the leather. As someone who has gotten dragged, I never engage this and am perfectly happy to have the slide on type without the safety, as well. 


Fit:

I tend to classify the E-motion flex trees as "Medium Wide" and that seems to be pretty accurate in this case. The tag and marketing call it a Medium for reference. Compared to my Courbette Magic, the tree may be a bit wider set but seems to flex less than the Magic, which tends to sit a little high in front until you get in the tack - then it settles and you have to pull the girth up. I haven't noticed that need while riding in the Royan thus far, however I have a feeling that the fit will be pretty forgiving. I will get some measurements together of all of my saddle trees and panels in another post as I think they may be helpful to others on the internet. 

The panel is soft but doesn't appear to bottom out and sit too low. The channel is HUGE and accommodates 4 fingers + my thumb throughout. The  saddle has a point billet and a back with a keeper. I am not using the keeper but it seems to be placed logically for a horse that doesn't have the problematic conformation that Bailey does. The billets are sewn onto soft nylon under the flap, which makes them easily replaceable if need  be - and the nylon allows me to pull the billets where I need them to hold the saddle secure. 

Pardon the recent oiling in this picture >

   Ride:
As I said, the Royan is super sticky to ride in and with the higher pommel/cantle, feel very secure to ride in, just like my Magic. The flap is slightly forward, which makes the ride for me, as I have a long femur and tend to struggle to fit into saddles smaller than 18". I am still riding with the feeling that my stirrup length isn't quite right, but that's a work in progress. I feel very secure riding in this saddle even with the feeling that my stirrups are too long - this is a great saddle for the occasional spooky moment or would be great for trail riding if you're in need of security. 


Overall: 
This seems like a very decent affordable saddle. It doesn't seem to have any inconsistencies in it's construction and when fit correctly gives a secure and balanced ride. It is proving to be comfortable to my horse and she seems happy wearing it and moves more freely though her shoulders. I do have some concerns that the leather will not hold up to heavy use, but for an eventer, rider starting out or riding several different horses, this saddle would be a great investment. I feel that the purchase would be "worth it' to me even if I pass it along or it begins to look scruffy after a few years because it was an affordable answer to my needs for fit. 

The flex tree also may be a draw for folks with young horses or horses who aren't a standard fit. I can't argue with the tree - I now own two horses who go happily in the E-motion flex tree more so  than a standard fixed tree and the saddles and trees both appear to be holding up at the time of this review. 


Update: August 2014

I have owned the Royan for some time now, and felt it was time to update the review itself and update everyone on how the saddle has been. So far, with minimal care and conservative use of conditioner (Passier Lederbalsam) the saddle has been holding up famously. I am seeing a touch of wear (read - lack of shine) where my seatbones hit, but under the leathers and other wear spots are not nearly as worn as I had been expecting - just areas where the leather is less shiny and the grain seems less well defined. The saddle also seems less susceptible to scratches and water as I would have guessed, as well.
BB rocking the Royan at Roebke's Run HT a few weeks ago

My trainer, a 2** rider who rides in real expensive french saddles has ridden in it and liked the balance and simplicity of the saddle, and had nothing bad to say about it at all, which was a relief. I ride with a Thinline pad with front shims and a crescent shaped girth, and have also taken to crossing the billets on both sides. This leaves me with a saddle that doesn't seem keep to slip around, which is a blessing as everything was slipping forward for the longest time. I do find that the 17.5 is a bit lacking in the seat, but I have strength to gain and thus don't have my stirrups as long as they could be. I like the minimal knee roll, which is just enough to offer good support through Bailey's enormous canter. It still feels very safe, and everyone always comments that it looks like the dressage equivalent of a couch - which is pretty true! I loved the close contact feel of my old saddle, but didn't love the lack of support it offered, and also didn't love the way my leg tended to fall asleep or get pins and needles if I wasn't perfect with my position. 

The verdict as of August 2014? I like this saddle. A lot. The tree is quite flexible, making it problematic if I forget my thinline pad, but Bailey did not react any differently to it when I did ride without the riser. I am still wishing for an 18 or 18.5, but hope that by gaining strength I can lower my stirrups a hole or two so I'm less impacted by the smaller seat.